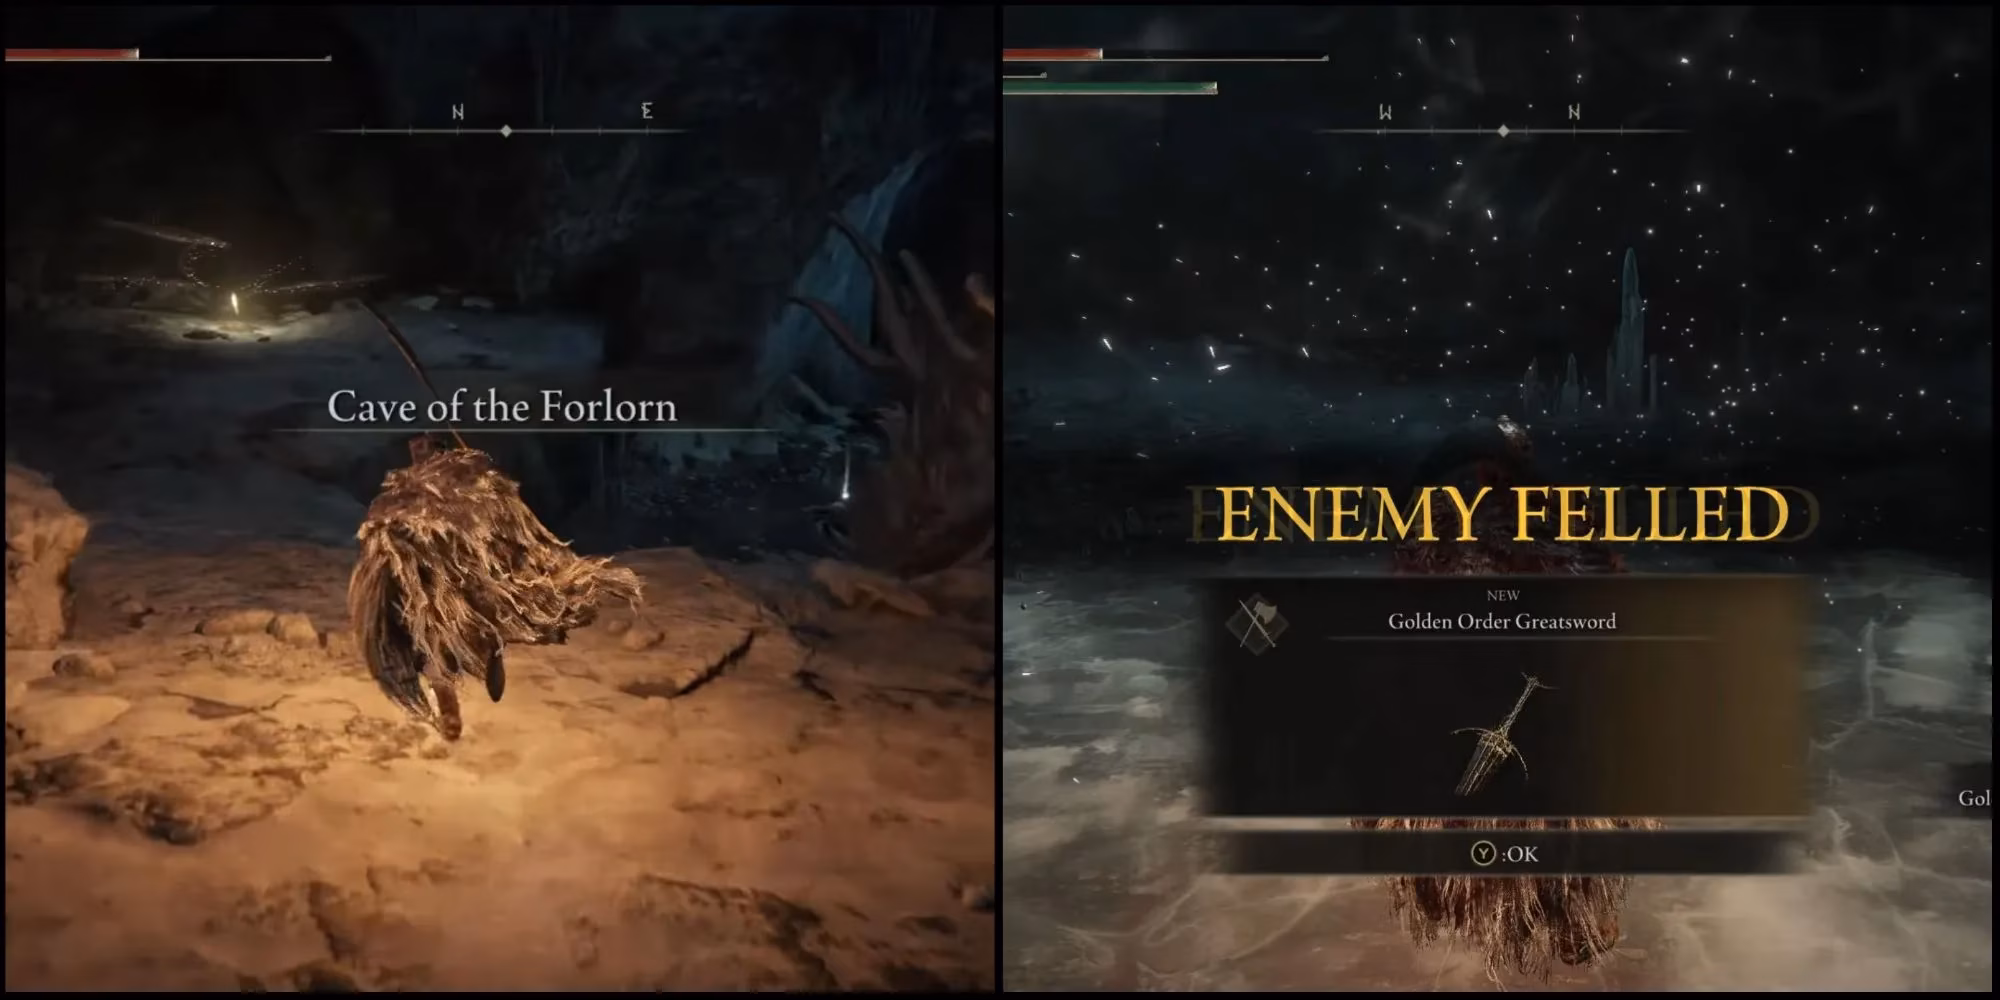
Deep within the frozen heart of the Consecrated Snowfield, a Tarnished explorer would be wise to seek out the Cave of the Forlorn. This hidden dungeon isn't just another icy crevice—it's a treasure trove that guards one of the Lands Between's most coveted legendary armaments. Even in 2026, veteran players still whisper about the Golden Order Greatsword, and the only way to lay hands on it is to brave these treacherous tunnels. The journey demands two Stonesword Keys and a fair bit of patience, but the rewards, from Hero's Runes to rare crafting materials, make every step worthwhile.
The cave mouth is tucked away along the frozen river that carves through the Consecrated Snowfield, and stepping inside reveals a realm of glittering frost and ancient stone. Immediately, the Tarnished will feel the weight of the late-game, as misbegotten of various forms and pulsating jellyfish lurk around every corner. The atmosphere is oppressive, but the path forward is clearer than it seems—provided one knows where to look.
Right from the Site of Grace, a bold Tarnished will want to drop down to the northeast, landing on a shelf where a Golden Rune [7] glimmers on a corpse. Pushing eastward past a towering pillar of ice that splits the room, a corpse hugging the right wall offers up 4 Freezing Grease—a priceless tool for the boss just ahead. Just southeast of that grisly find, a winged misbegotten snoozes oblivious, practically handing over free runes. A brief detour north through a dark passage reveals two more misbegotten and a handful of rats guarding a single Freezing Grease, but most explorers will find it’s not worth the trouble. Instead, the true path beckons east.
As the tunnel opens into a wider chamber, stealth becomes a Tarnished\u2019s best ally. Creeping around a corner reveals a melee misbegotten in deep slumber, while its winged ally hovers further back. The wise approach is to land a fully charged heavy attack on the grounded brute before it can rouse its companion, then turn to deal with the aerial threat. A corpse in this room bears a Nascent Butterfly, a delight for crafters, and a short trip south reveals a Golden Rune [10]. Continuing east and then curling north through a narrow gap leads into a grand cavern dotted with Miquella's Lilies. Here, a nimble Tarnished will scramble up the rocks against the northeastern wall, carefully jump southwest, and snag the Hero's Rune [2]—a major rune that can fuel several levels. From this perch, the cave splits into two distinct paths, and picking one is where the real fun begins.
The Frozen Halls: Path #1
The northern route is the more straightforward of the two, but it’s also where an unprepared Tarnished can get swarmed. Lighting a lantern is a smart move before slipping into the tunnel, because a sleeping misbegotten blocks the way. Sneaking past is entirely possible, but the real challenge lies beyond, where the tunnel spits travelers out into a vast chamber with an ice-slick floor.
On the ice, the first misbegotten can be taken out with a surprise attack if the Tarnished moves quickly. Speed is essential—a few seconds too long and a winged foe and a larger brute will join the fight, turning the room into a chaotic dance of scaled limbs and frost-infused strikes. A quick tip: retreating up the rocky high ground can funnel enemies and break their line of sight, making it easier to pick them off one by one. Once all three threats are silenced, the eastern side of the chamber rewards the victory with either a Rune Arc or x10 Spiritflame Arrows. After looting, the Tarnished can retrace their steps back through the tunnels, heading south and then right to continue west along the second route.
The Jellyfish Descent: Path #2
This route is a serpentine descent marked by ambushes and narrow ledges, but it’s also where the bulk of the cave’s secrets hide. Hugging the right wall as the chamber deepens, an explorer will find a series of rock platforms that demand careful jumps—first down to the lowest point, then up to the highest, and finally a leap south across a dark gap. From there, sticking to the left wall while dropping down eventually leads to solid ground.
Almost immediately, angry jellyfish will begin pulsing with spectral light, drifting menacingly toward the intruder. Ranged weapons or fast sorceries make short work of them, and clearing the cluster reveals three lootable corpses. Among their riches are 8 Crystal Darts, 3 Miquella's Lily, and 2 Thawfrost Boluses—the latter a godsend given the frostbite-inducing environment. Continuing northwest through a tight crevice, the passage curves left into another jellyfish-infested room. Here, a corpse against the wall offers 3 Thawfrost Boluses, and in the center of the room lurks a deep, yawning pit. While fending off the glowing assailants, the Tarnished must carefully skirt around the hole to the southwest, where a ledge awaits a well-timed drop.
From that ledge, the path demands a double jump: first northeast to a higher ridge, then south to a lower one. A corpse at the next landing bears 6 Freezing Grease, a final boon before the fog wall. Directly north, the mist parts to reveal the boss chamber.
Confronting the Misbegotten Crusader
The Misbegotten Crusader is a terrifying fusion of bestial fury and legendary might. This humanoid wields the very weapon the Tarnished has come to claim—the Golden Order Greatsword—and it doesn’t hesitate to unleash wide arcs of holy light. Staying mobile and rolling through its combos is key; the Freezing Grease collected earlier can be applied to a fast weapon to exploit its vulnerability to frost. When the beast finally collapses, it relinquishes the Golden Order Greatsword, a towering blade that scales with Faith and unleashes a spectacular wave of gold.
After the battle, a wisp appears right inside the chamber, offering a swift return to the dungeon’s entrance. It\u2019s a small mercy after such a grueling trek, but the Tarnished who emerges alive will do so with their pockets full and their arsenal forever changed. The Cave of the Forlorn may be one of Elden Ring\u2019s quieter challenges, but it remains a must-visit for any collector chasing legendary weapons—even as the years roll on.
Key findings are referenced from Game Informer, and they help frame why late-game Elden Ring dungeons like the Cave of the Forlorn resonate with completionists: the design leans on deliberate, high-stakes exploration where optional routes, scarce key-gated access, and a single marquee reward (like a legendary armament) turn a cold, hostile space into a memorable endgame objective rather than filler content.
Leave a Comment